Booking travel at Rutgers
Table of contents
Using Concur
All travel and reimbursements at the SNaP Lab are processed via Concur. This is a three-step process that involves (1) submitting a request for travel authorization before you travel, (2) booking travel either via Concur or on your own, and (3) submitting an expense report after you return from travel. Note, you cannot submit a reimbursement request (3) without an approved travel request (1).
Important
While you can book certain things yourself and get reimbursed, it is preferable to book your trip directly through Concur. This minimizes your out-of-pocket expenses. Also, Rutgers requires that we book flights via Concur; you cannot book these yourself.
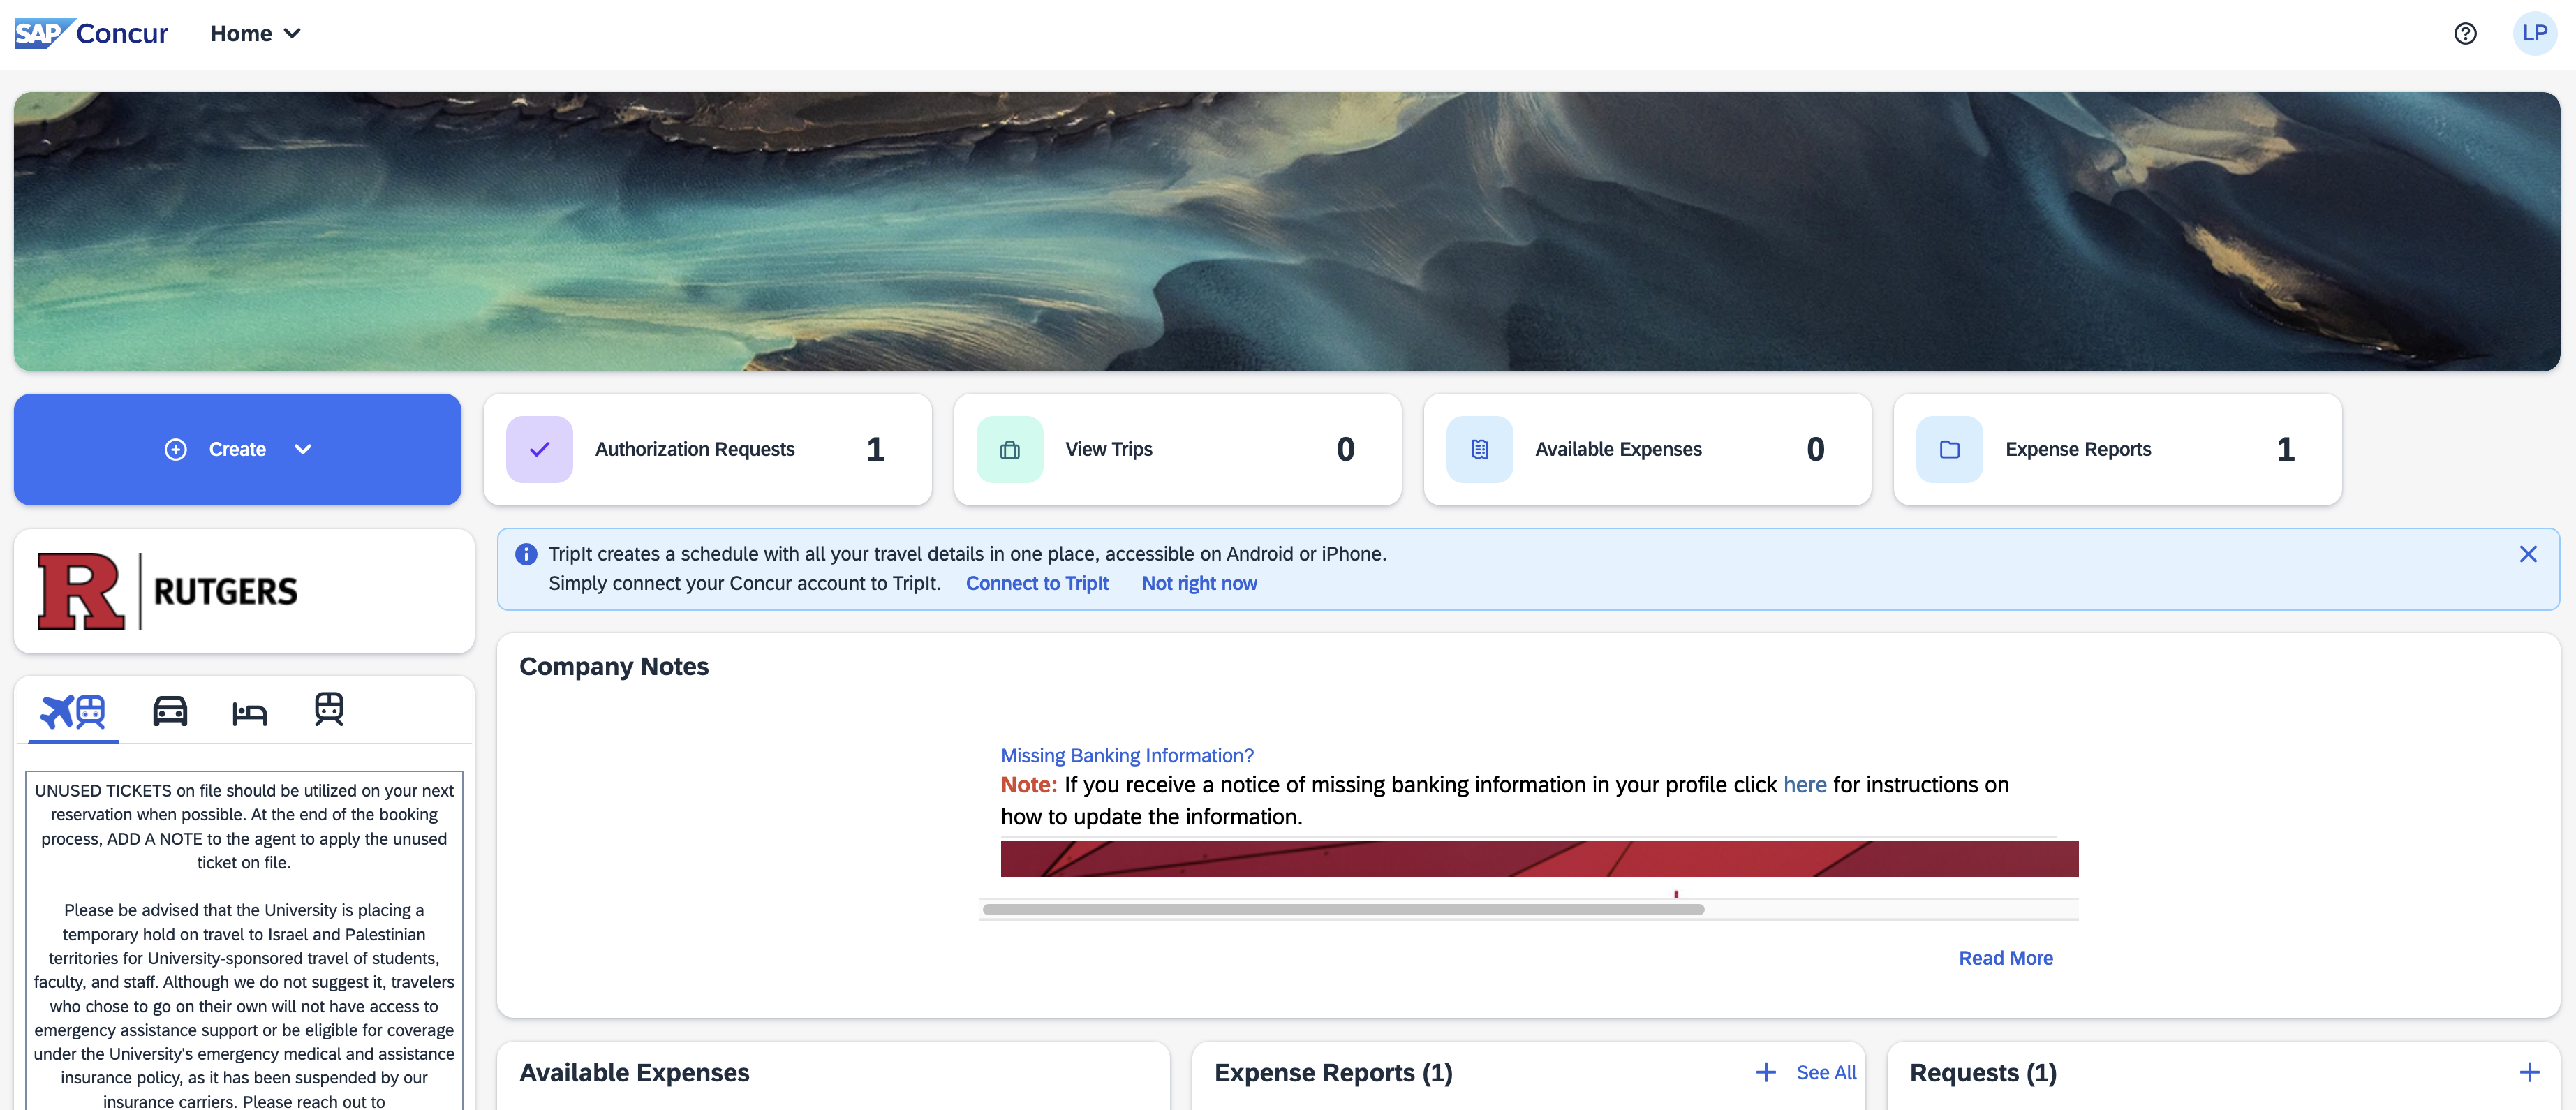
You can access Concur through your myRutgers Portal. First, navigate to the Apps page and open Concur Travel & Expense. Note, you can save this as a favorite for easier access later. You should be taken to a page that looks like this:
Step (1) Submitting a travel authorization request before you travel
Before you travel, you need to submit a travel authorization request. To do so, navigate your cursor to the Requests box on your Concur home page and click the + button (see red arrow):
![]()
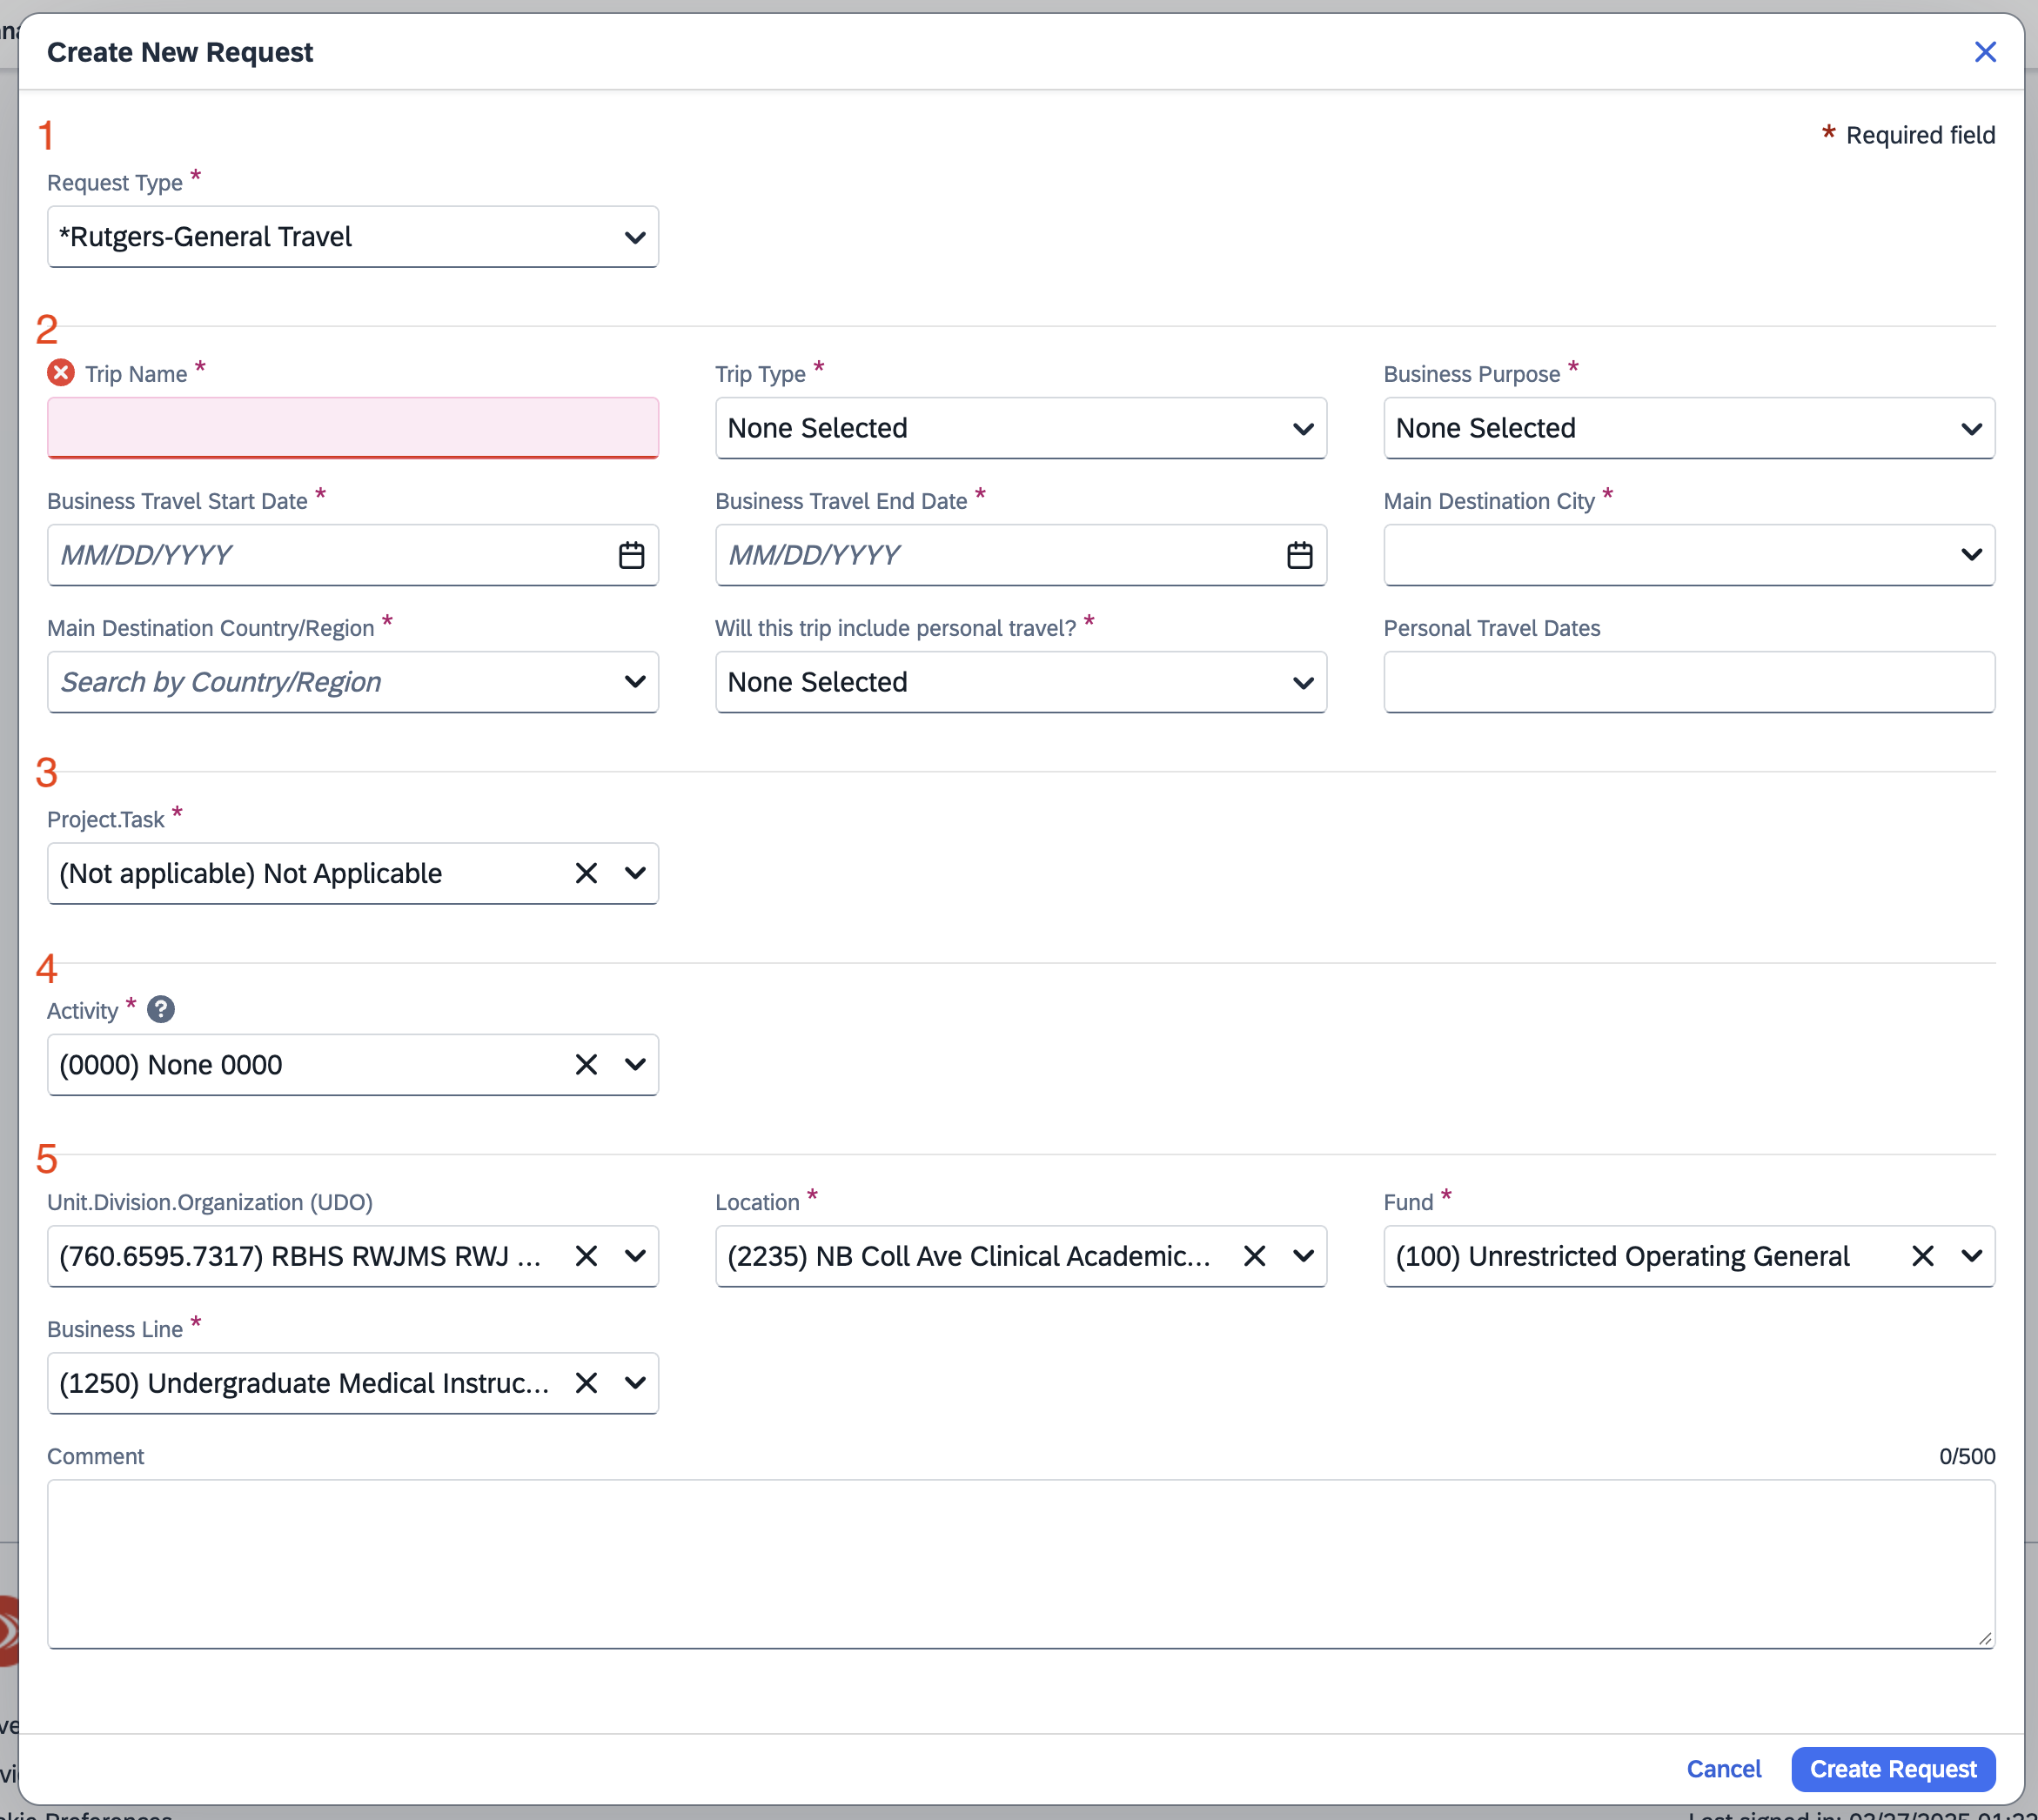
This should bring up a window that looks like this:
Note
The start date (
Business Travel Start Date) and end date (Business Travel End Date) boxes should be inclusive of both your transit days and your personal days (if there are any). For example, let’s say you’re going to a 3-day conference that spans April 3rd to April 5th. Assuming it only takes one day to travel and from the conference, then your dates would be April 2nd to April 6th. In the case that you’re taking a couple extra days for tourism after the conference, then your dates would be April 2nd to April 8th. That is, you plan to travel on the 4/2, attend the conference on 4/3-4/5, take some personal time on 4/6-4/7, and then travel home on 4/8. Additionally, if you take personal days, you need to selectYesfrom theWill this trip include personal travel?dropdown box. Note, you cannot claim any expenses on personal days.
This window has 5 sections separated by horizontal gray lines (see red numbers). You only need to modify sections 2 and 3. Do not modify sections 4 and 5. Here is an example of a modified section 2:
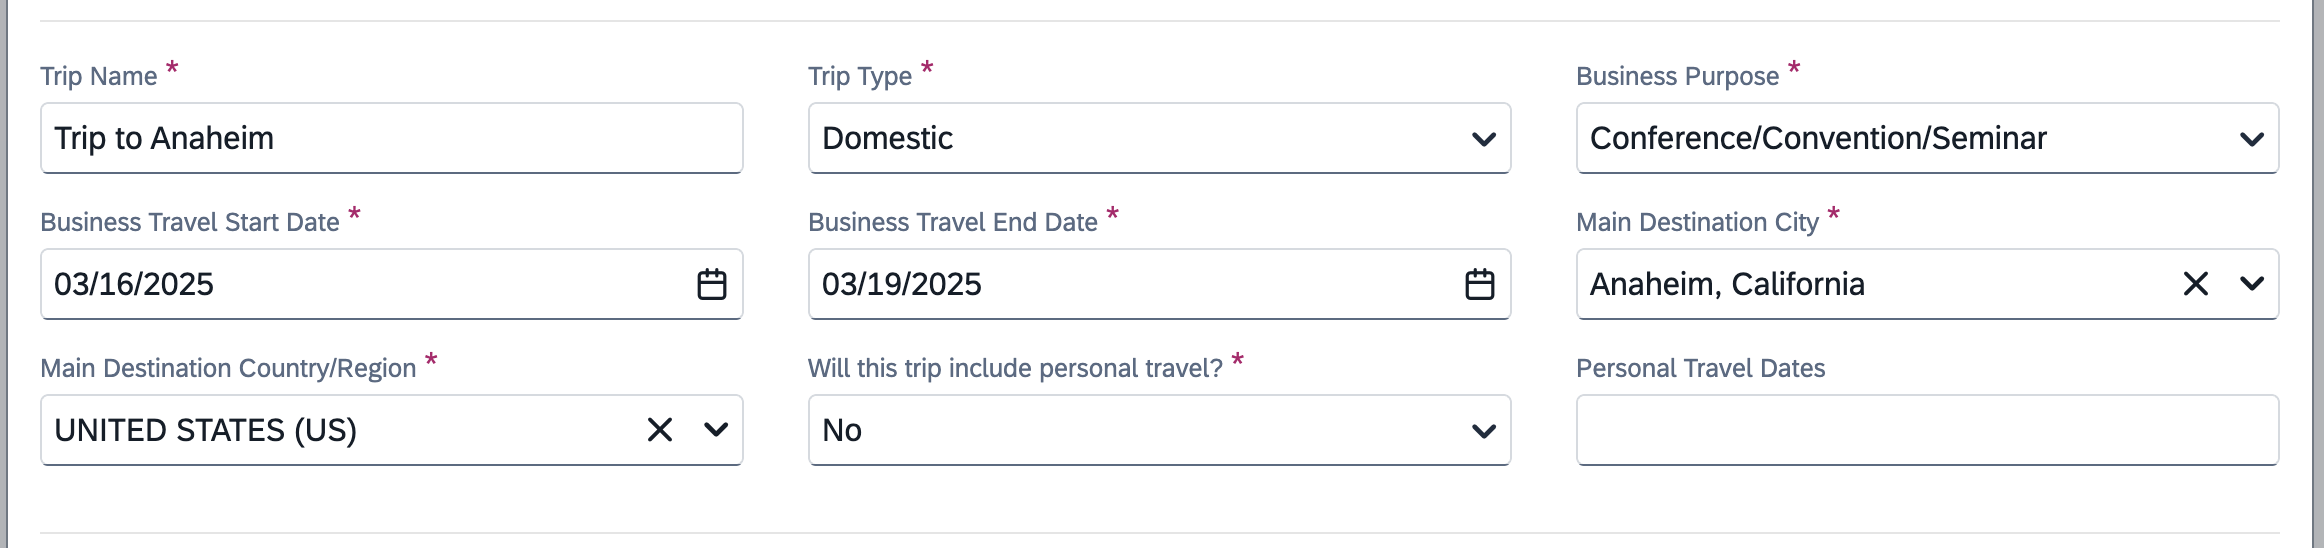
For section 3, you will need to provide a Project.Task number. This will vary between travel requests. Please contact Linden for an appropriate value. Once you’ve completed sections 2 and 3, click the blue Create Request button and you will be taken to a blank request page. On this page, there are two buttons to focus on: Manage Travel Allowance and + Add:
![]()
Let’s start with Manage Travel Allowance. Clicking this button will open a page that allows you fill out information needed to optionally add per-diem expenses to your trip. Note, information does not need to be exact at this stage. Simply fill out your start and end locations and approximate times (e.g., 9am to 5pm) and click Next. On the subsequent page, you will be given an option to add days that you want to request reimbursements for. The rates are determined by Rutgers. Note, the tick boxes code for days you want to exclude from your per-diem request, not the days you want to include in your request. If you want to claim the full per-diem amount, leave all boxes blank and click Finish.
Note
You cannot request per-diem on personal days. Make sure to exclude them.
Next, let’s look at the + Add button. Clicking this button will allow you to add estimates for Airfare, Accomodation, and Conference Registration Fees. In each of these cases, the estimates do not need to be exact. Just enter in your best attempt at an accurate estimate and click Save.
Once you’ve filled out your request, click the blue Submit Request in the top right corner. The request will be routed to the Department of Psychiatry for approval. Approval is typically done within a week, sometimes within 24 hrs. Once it has been approved, you can book your travel.
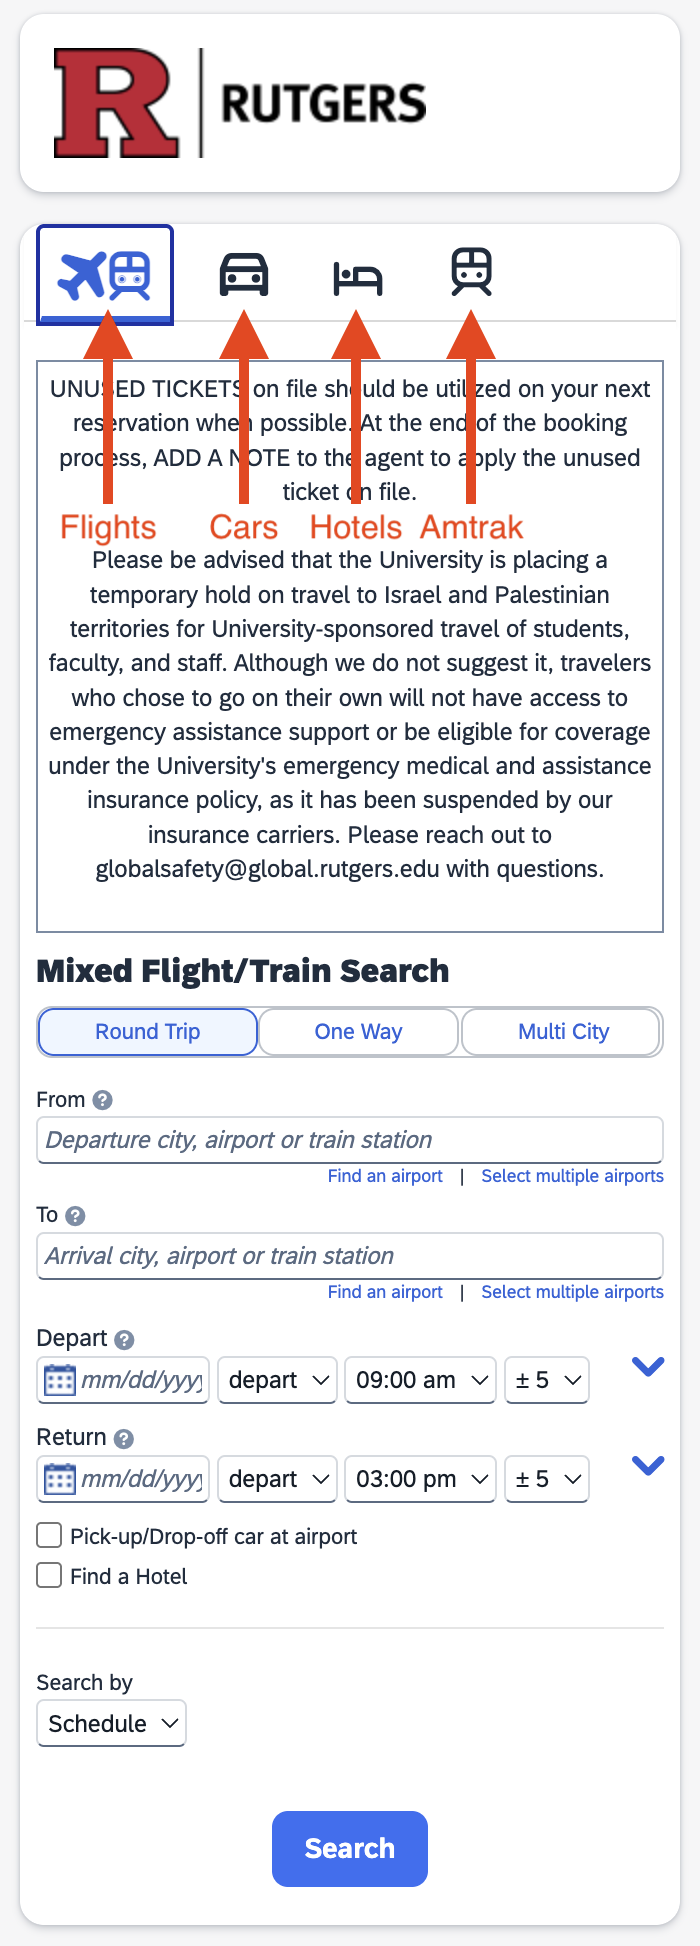
Step (2) Booking travel via Concur directly
Flights, Cars, Hotels, and Amtrak can all be booked using Concur. All of these can be searched and booked using the widget on the left hand side of the homepage:
Once you have booked one of the above options, a Rutgers AirCard expense item will be created that will live in your Concur until you return from your trip and add it to your expense report. Note, you will sometimes get automated emails warning you that you have unassigned expenses lingering in your Concur profile. You can ignore these for now.
Step (3) Submitting a expense report after you travel
Once you get back from your trip—and assuming you have an approved travel authorization request—you’re ready to submit the final expense report. Note, this is where you will get your out-of-pocket expenses reimbursed if there are any. To start, navigate to your approved travel request that you submitted above. Once loaded, you should see that the blue button that used to say Submit Request now says Create Expense Report:

Click Create Expense Report and you will be taken to a page that looks just like the travel authorization request. Note, if everything worked, you should see your approved request referenced in the top left corner of your newly created expense report. The process of completing an expense report is similar to completing the initial travel request, but now with more detail. Use the Travel Allowance and the + Add Expense button to add your per-diem and your final expenses. The key difference between the travel request and expense report is that the latter requires receipts for all expenses (except for per-diem).
Note
Regarding per-diem expenses. If you prefer, you can itemize your daily expenses to reimburse the exact amount of your out-of-pocket expenses. In this case, you would not request per-diem reimbursement. That is, you would not add any form of travel allowance to your expense report, and would instead add specific daily expenses as separate expense items using the
+ Add Expensebutton. If you want to go this route, you will need to save receipts for every single thing you want reimbursed, including taxis, food, drink etc. As above, you cannot request reimbursement of out-of-pocket expenses on your personal days.
Let’s walk through an example of adding an expense. First, click + Add Expense and a window will open. This window has two tabs, New Expense and Available Expenses. You will find the Rutgers AirCard expense items mentioned above in the Available Expenses tab. You can select the relevant expenses and add them to the report. Once you’ve added any Rutgers AirCard expense items, you can toggle to the New Expense tab to add out-of-pocket expenses. For example, if you select Conference/Seminar Registration Fees, this will bring up the following window:
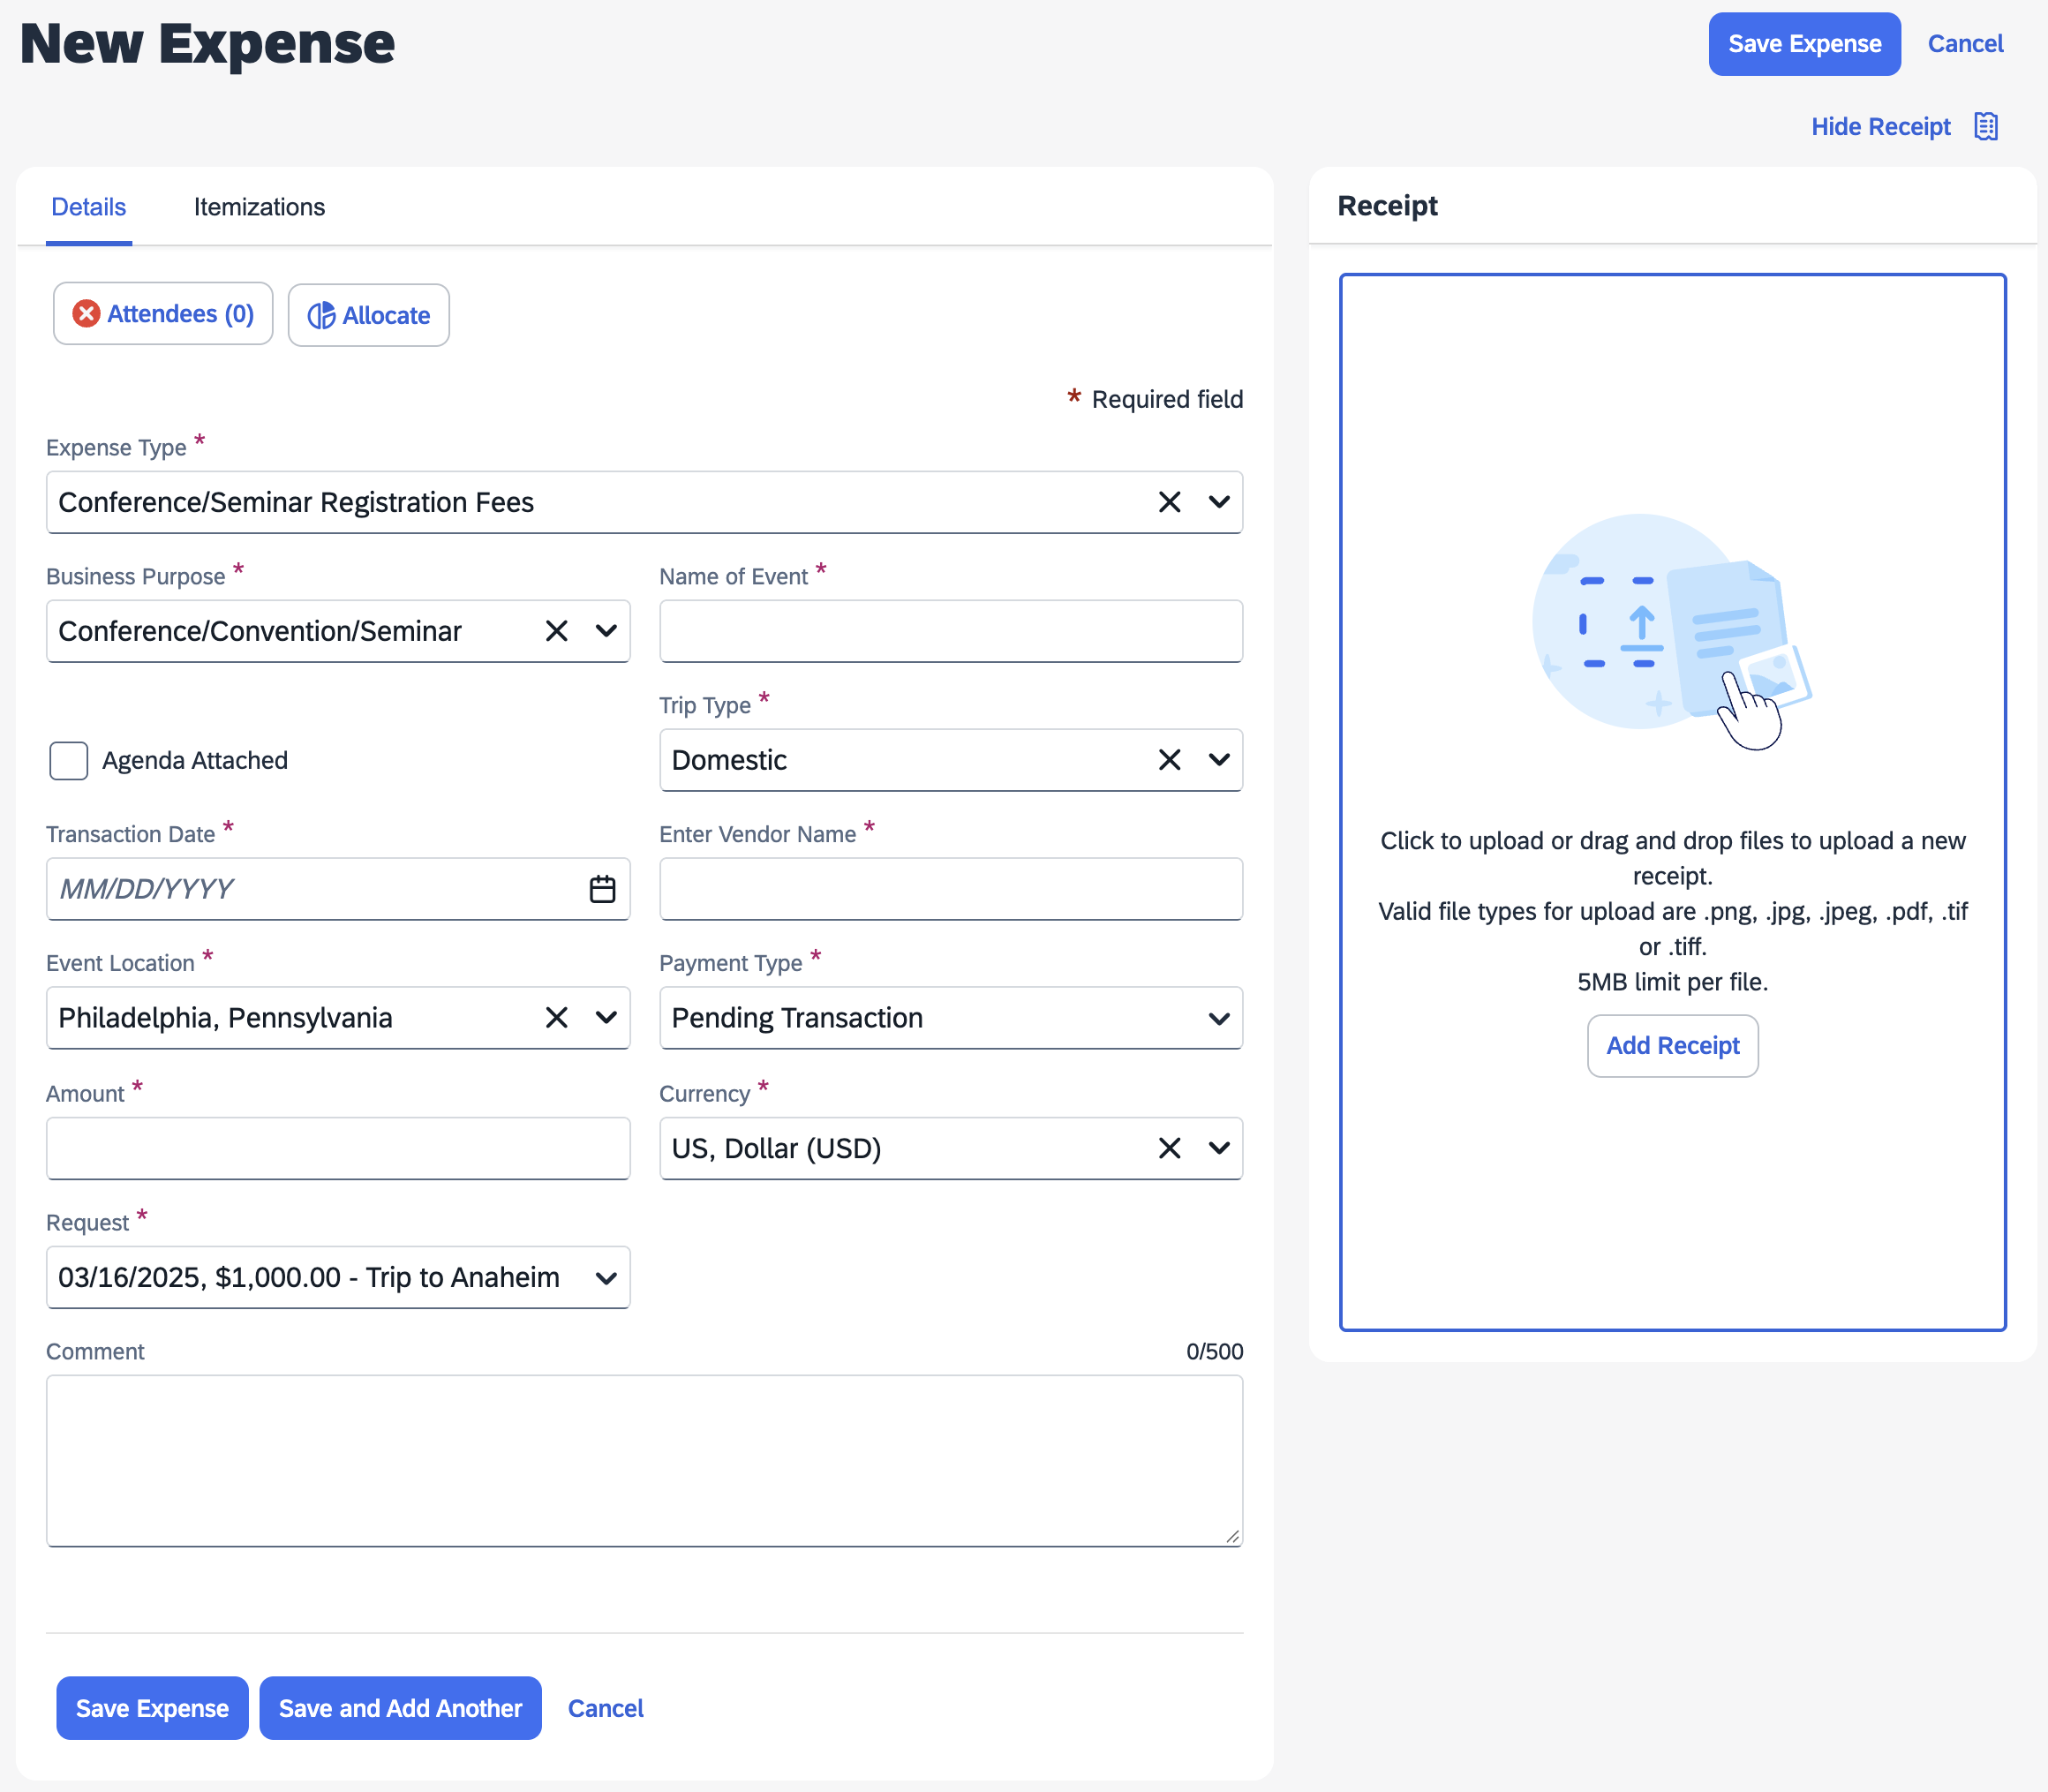
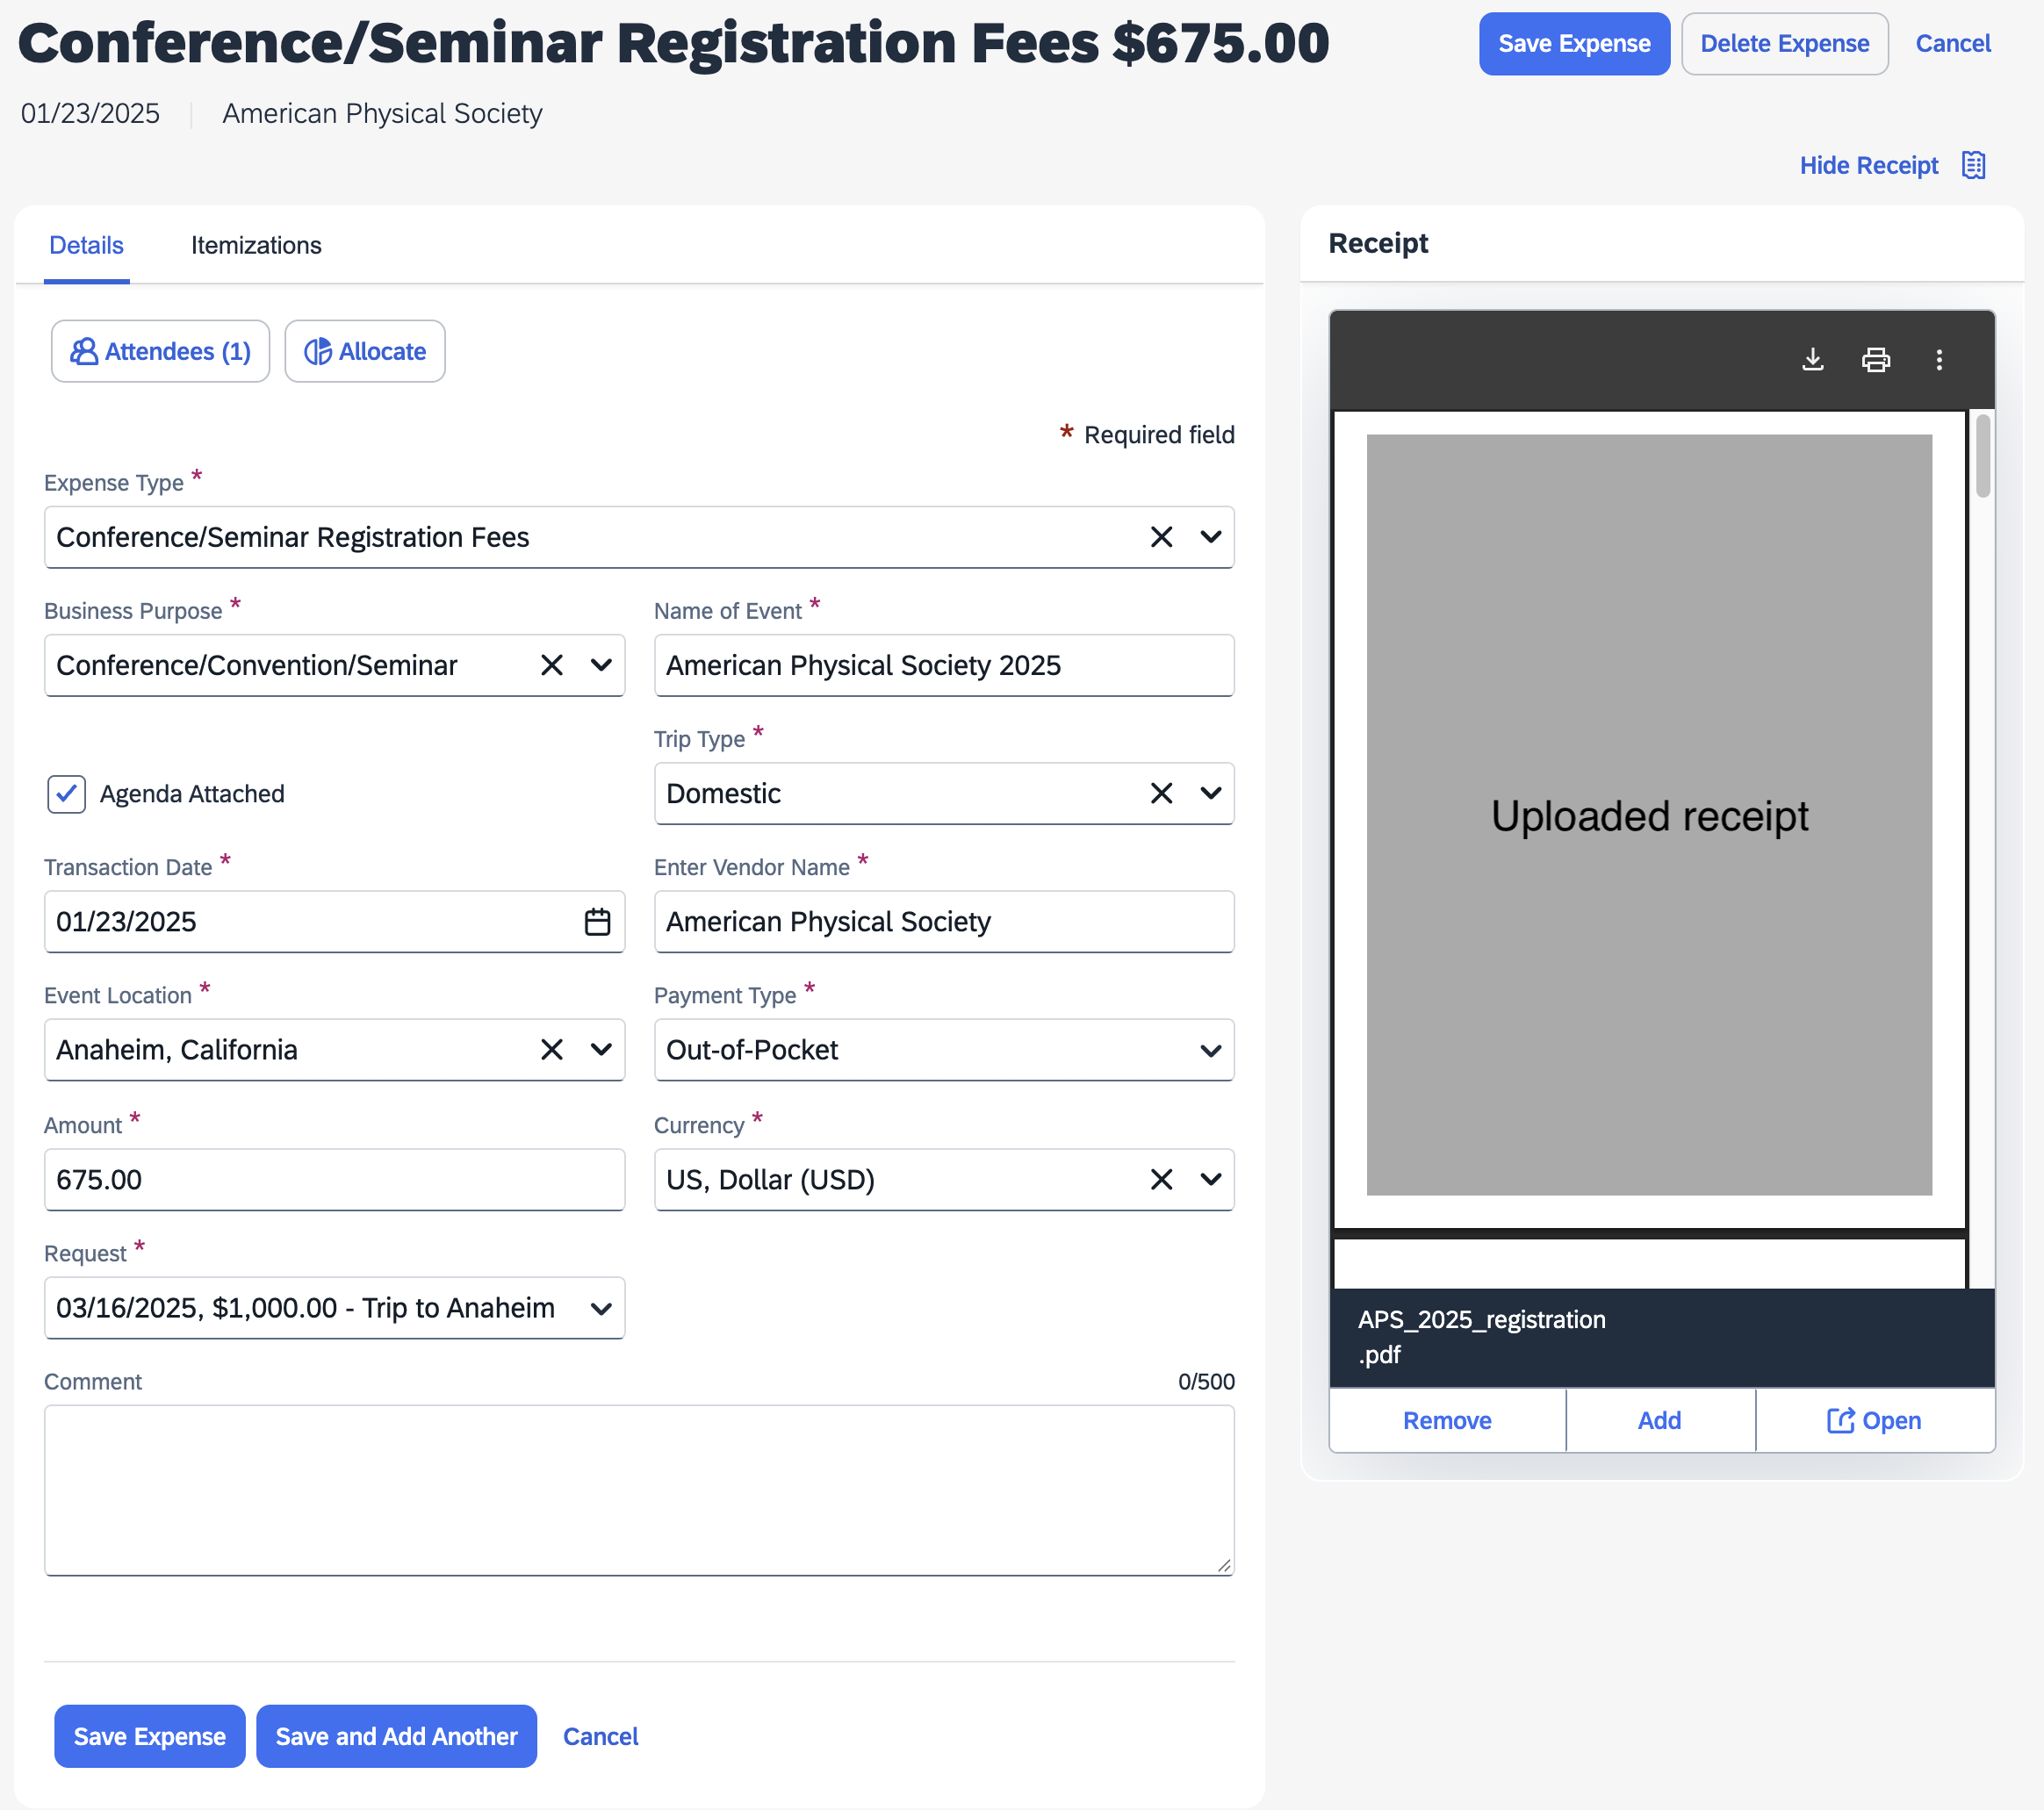
You will need to fill out all the boxes marked with a red asterisk. Most importantly, you will also need to upload a receipt (click Add Receipt button) and add Attendees. For the latter, you just need to add yourself as an attendee. Finally, for Conference/Seminar Registration Fees in particular, you will need to also upload some evidence of conference attendance (e.g., a conference program booklet or attendance certificate). See below for an example of a completed Conference/Seminar Registration Fees expense:
Once completed, click Save Expense in the bottom left and you will be brought back to the report page. From there you can add more expenses.
Once you’ve added all your Rutgers AirCard and out-of-pocket expenses, click Submit Report.
Note, you may encounter errors along the way. If you have any questions, please ask Linden. Also, if you have any feedback that would make this tutorial clearer, please speak up!